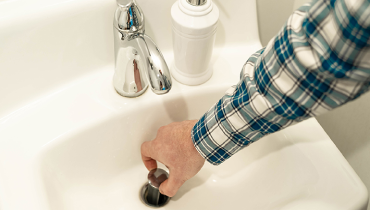
Whether you need to learn how to install a sink pop-up drain stopper for your sink for the first time or are replacing an old one, having the right tools and tips to get the job done right is essential. Homeowners appreciate this style of drain stopper because it has a lever that fits directly behind the faucet that they can conveniently lift or lower to open or close the drain.
Many DIYers will find this is a straightforward installation job, but keep in mind you can always call on the team at Mr. Rooter to get professional plumbing assistance when you need it.
If you are ready to give it a go DIY style, here’s what you will need to get started with your project:
- Pop-up drain stopper kit
- Bucket
- Rag
- Pliers
- Plumber’s putty
- Wet-dry Shop-Vac
6 Steps to Install a Sink Pop-up Drain Stopper
The supplies and tools are in place, and now you’re ready to get down to business. Follow these six steps to install your sink’s pop-up drain stopper:
- Prep the area – Begin by removing any excess water from the sink, because once you remove the drain trap, you aren’t going to want water to fall out onto you or the floor. You can also place a bucket or pot under the sink to catch additional water, just in case.
- Remove the old drain – Under the sink, you will find the parts to the drain and the pop-up lift rod. Unscrew the rod to remove it. Then, use your pliers to grab and loosen the lock nut near the underside of the lavatory sink. Push up on the drain assembly and move it around to loosen it up and be prepared for any remaining water to flow out. Go back to the sink’s top and begin unscrewing the pop-up ring to remove it, which will then allow the drain assembly to come out from beneath the sink. In some existing installations, the pop-up ring is part of the entire assembly and will have to be pulled up thru the sink.
- Install the drain flange – After cleaning any residual caulk or putty around the hole to the drain, apply new plumber’s putty around the base of the chrome ring, which is located at the top of the new drain flange. You will screw on the flange in the next step.
- Prep the bottom assembly – Place putty on the rubber washer located on the bottom assembly to achieve a good seal at the bottom of the sink. Then push the assembly upward through the sink’s bottom until it seems like the rubber gasket is sealed thoroughly. This is when you will screw the flange’s top to the bottom drain assembly that is now sticking up. Connect it, but don’t worry about it being tight yet. Use the pliers to tighten the lock nut located on the bottom assembly. Clean up any excess putty that comes out from the ring with a rag or paper towel.
- Install the stopper – Place the stopper into the drain from the top and ensure the hole is facing the back of the sink. Returning to the bottom, take the nut with the ball on the inside and thread it into the drain pipe. Go ahead and push the rod to make sure the drain is moving up and down. If it works correctly, tighten the nut. If not, you will need to move the stopper until it catches onto the rod.
- Position the lever – Feed the lever into the sink’s hole, connecting the horizontal rod with the vertical lever. You can adjust the height of the pop-up by shifting the extension pin up or down to a different slot.
Get Hassle-Free Pro Pop-up Drain Stopper Installation from Mr. Rooter
What if you don’t have the time or interest to install a sink pop-up drain stopper on our own? Our team of local plumbing experts at Mr. Rooter is here to lend a hand. If at any point during the installation you need assistance – even if it’s before you begin – you can trust us to install new plumbing fixtures in your bathroom or in other areas of your home. For professional installation, call 855-591-0128 or request a job estimate online now.
Looking for more bathroom tips? Learn how to keep your bathroom mirror fog free with these hacks from Glass Doctor. Like Mr. Rooter, Glass Doctor is part of Neighbourly’s community of home service professionals. Visit GetNeighbourly.ca to find the best house cleaners, electricians, handymen, HVAC specialists and more.